

Write and edit articles in your Knowledge Base
Create clear, useful Knowledge Base articles. Format content visually or in Markdown, add images, review settings, and understand how saving and publishing work.
Create clear, useful Knowledge Base articles without choosing between a visual editor and Markdown. Weav gives you both views of the same content, with formatting tools, images, native documentation blocks, article settings, and draft previews.
This guide explains how to write an article, check it, and save or publish it safely.
Open or create an article
- Go to Knowledge Base → Content.
- Select an existing article, or choose New article to start one.
- Give the article a clear, task-focused title.
- Add a short excerpt under the title if you want a summary of what the article covers.
- Choose a Category in Settings so readers can find it in the right place.
An article can remain Uncategorized, but a relevant category makes the Knowledge Base easier to browse. Use the Content view to organize sections and categories when needed.
The editor opens with Visual and Markdown tabs. Its header shows the selected language, article status, and available save or publication controls. Unsaved changes means your latest edits have not been stored yet.
Visual and Markdown are two views of one article. They are not separate versions or separate drafts. Switching tabs is not a save or a publication action. Save explicitly after making changes.
Write in the Visual editor
Use Visual when you want to format the article directly, like a document. The editor uses public-style typography and native block previews, while also showing editing controls that readers will not see.
The toolbar includes:
- Undo and Redo.
- Text style for normal text and headings.
- Bold, Italic, Strikethrough, and Inline code.
- Link, bulleted and numbered lists, and quotes.
- Insert image and table controls.
When your cursor is in a table, Table options lets you add or remove rows and columns, or delete the table.
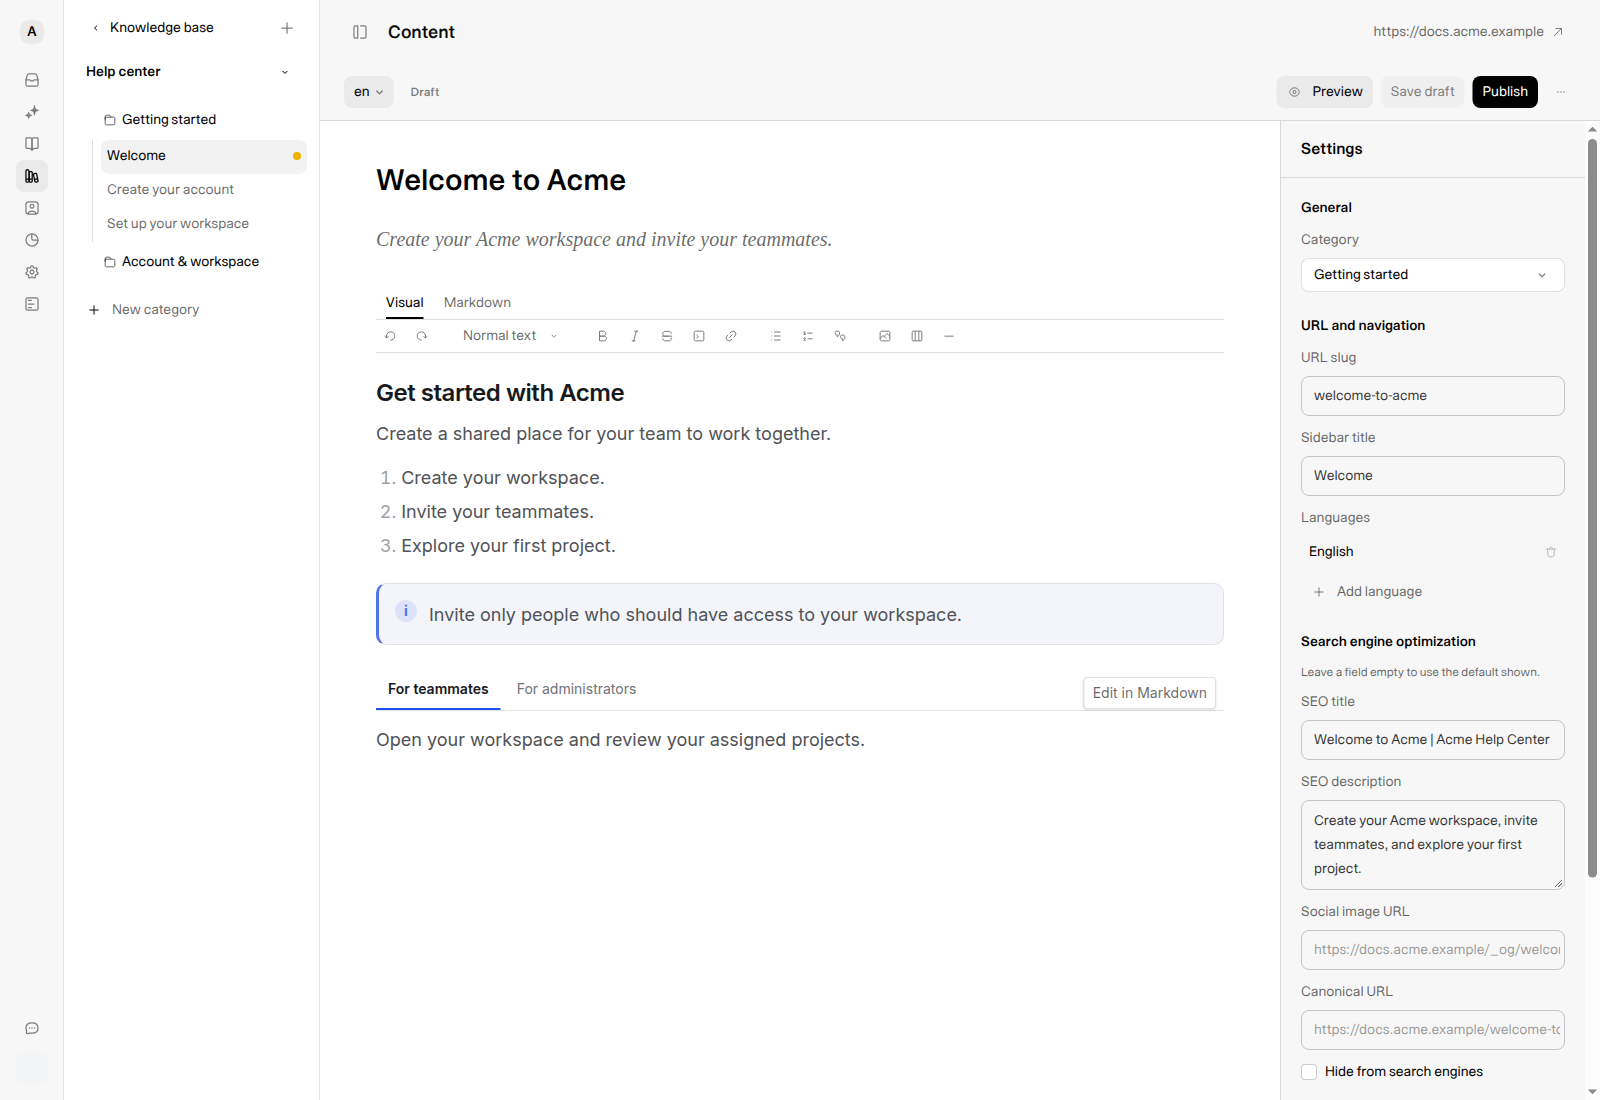
This is a saved draft example. Formatting the article does not publish it.
All slash-menu commands
The Visual editor's insert menu uses a forward slash /, not a backslash \. It includes 20 commands in three groups: Basic, Callouts, and Docs blocks.
Open and use the menu
- Put your cursor at the start of a line, or after a space in editable text.
- Type
/to open the menu. Scroll to see commands further down the list. - Continue typing to filter by a command's name or a supported keyword. For example,
/h2finds Heading 2,/imagefinds Image, and/calloutlists the five callout types. - Click a result, or use Up/Down followed by Enter or Tab to select it.
- Press Esc to close the menu without choosing a command.
The typing examples below are menu searches, not commands that run as soon as you type them. Select a matching result to apply it; Weav removes the slash-search text when you insert the block.
The menu works in editable text in Visual. It does not open inside a code block, in a read-only article, or in the Markdown source tab. If you see No results, shorten or clear the search.
Basic commands
| Command | Type to find it | What it does and when to use it |
|---|---|---|
| Text | /text |
Formats the text block as a normal paragraph. Use it to return from a heading to ordinary article text. |
| Heading 1 | /h1 |
Formats a top-level heading within the body. Use sparingly: the article title already supplies the page's main heading. |
| Heading 2 | /h2 |
Creates a main section heading, such as “Before you begin” or “Reset your password.” |
| Heading 3 | /h3 |
Creates a subsection beneath a Heading 2. Keep the heading hierarchy logical. |
| Bulleted list | /bullet |
Formats an unordered list for related points, requirements, or options that do not have to happen in sequence. |
| Numbered list | /numbered |
Formats an ordered list for a sequence of concise instructions. |
| Quote | /quote |
Formats a blockquote to distinguish quoted or highlighted text from ordinary paragraphs. |
| Divider | /divider |
Inserts a horizontal rule to separate parts of a long article. |
| Code block | /code |
Creates a preformatted code block for code, configuration, or examples that should remain literal text. It does not execute the code. |
| Table | /table |
Inserts a three-column, three-row table, including its header row. Use it for comparisons or structured reference information. |
| Image | /image |
Opens the image-file picker. Choose a supported file to upload and insert; a new article must be saved first. |
For most articles, use Heading 2 for main sections and Heading 3 for their subsections. A compact sequence usually needs Numbered list; choose the Steps documentation block below when each step needs its own title and richer explanation.
After inserting a table, place your cursor inside it and use Table options in the toolbar to add a row below, add a column to the right, delete a row or column, or delete the table.
Callout commands
Callouts draw attention to information readers should not miss. All five types insert an editable callout and place the cursor inside it so you can start writing immediately.
| Command | Type to find it | Suggested use |
|---|---|---|
| Note | /note |
Important context, prerequisites, or a clarification that applies to the surrounding instructions. |
| Tip | /tip |
An optional shortcut, recommendation, or way to get a better result. |
| Warning | /warning |
A risk, irreversible action, potential data loss, or another consequence readers should understand before continuing. |
| Info | /info |
Supporting background or an explanation that adds useful context. |
| Check | /check |
A positive confirmation, expected successful outcome, or completion message. |
Check is a callout, not an interactive checkbox or checklist. These suggested uses are writing conventions, not rules enforced by the editor. Keep callouts short and reserve warnings for meaningful risks.
Documentation-block commands
These commands insert starter content. In Visual, you can inspect the rendered block; use Edit in Markdown to change its source, titles, and body content.
| Command | Type to find it | Starter content and use |
|---|---|---|
| Tabs | /tabs |
Inserts two tabs with example titles and content. Use it for alternatives, such as instructions for different platforms. Rename the tabs and replace their content in Markdown. |
| Steps | /steps |
Inserts two titled steps with example descriptions. Use it for a guided procedure where each step needs more than a short list item. Edit the step titles and instructions in Markdown. |
| Cards | /cards |
Inserts a two-column group containing two example cards. Use it to introduce related topics or resources. Edit card titles, descriptions, links, and supported layout options in Markdown. |
| Accordion | /accordion |
Inserts an accordion group with one example question and answer. Use it for optional details or a compact FAQ, and replace the starter text in Markdown. |
Edit in Markdown appears when you hover over, focus, or select a documentation block. Inserting a block does not publish it. Replace the starter text before saving the finished article, then check the saved draft preview.
Other advanced content, such as Frame, Code group, or Parameter blocks, can be previewed when supported by the renderer but does not have a command in this insert menu. Add or maintain that syntax through Markdown instead of looking for a slash-menu item.
Some advanced HTML or unsupported content appears in a protected, labelled box rather than as an ordinary editable paragraph. Keep that source intact and review it in Markdown instead of replacing it just to remove the box.
Edit the Markdown source
Choose Markdown to work directly with headings, lists, links, code fences, quotes, and documentation-component syntax. The Markdown toolbar provides shortcuts for common formatting and image insertion.
For example, this source creates a short heading, an ordered list, and a quote:
## Get started with Acme

1. Create your workspace.
2. Invite your teammates.

> Invite only people who should have access to your workspace.
Use ordinary Markdown syntax, not an HTML-escaped version: a quote starts with >, not the text >.
Native component tags are expected in the Markdown source. They should render as blocks in Visual and in the saved article preview—not as stray markup in the article body. Keep opening and closing tags balanced, and leave code fences around examples that should remain literal text.
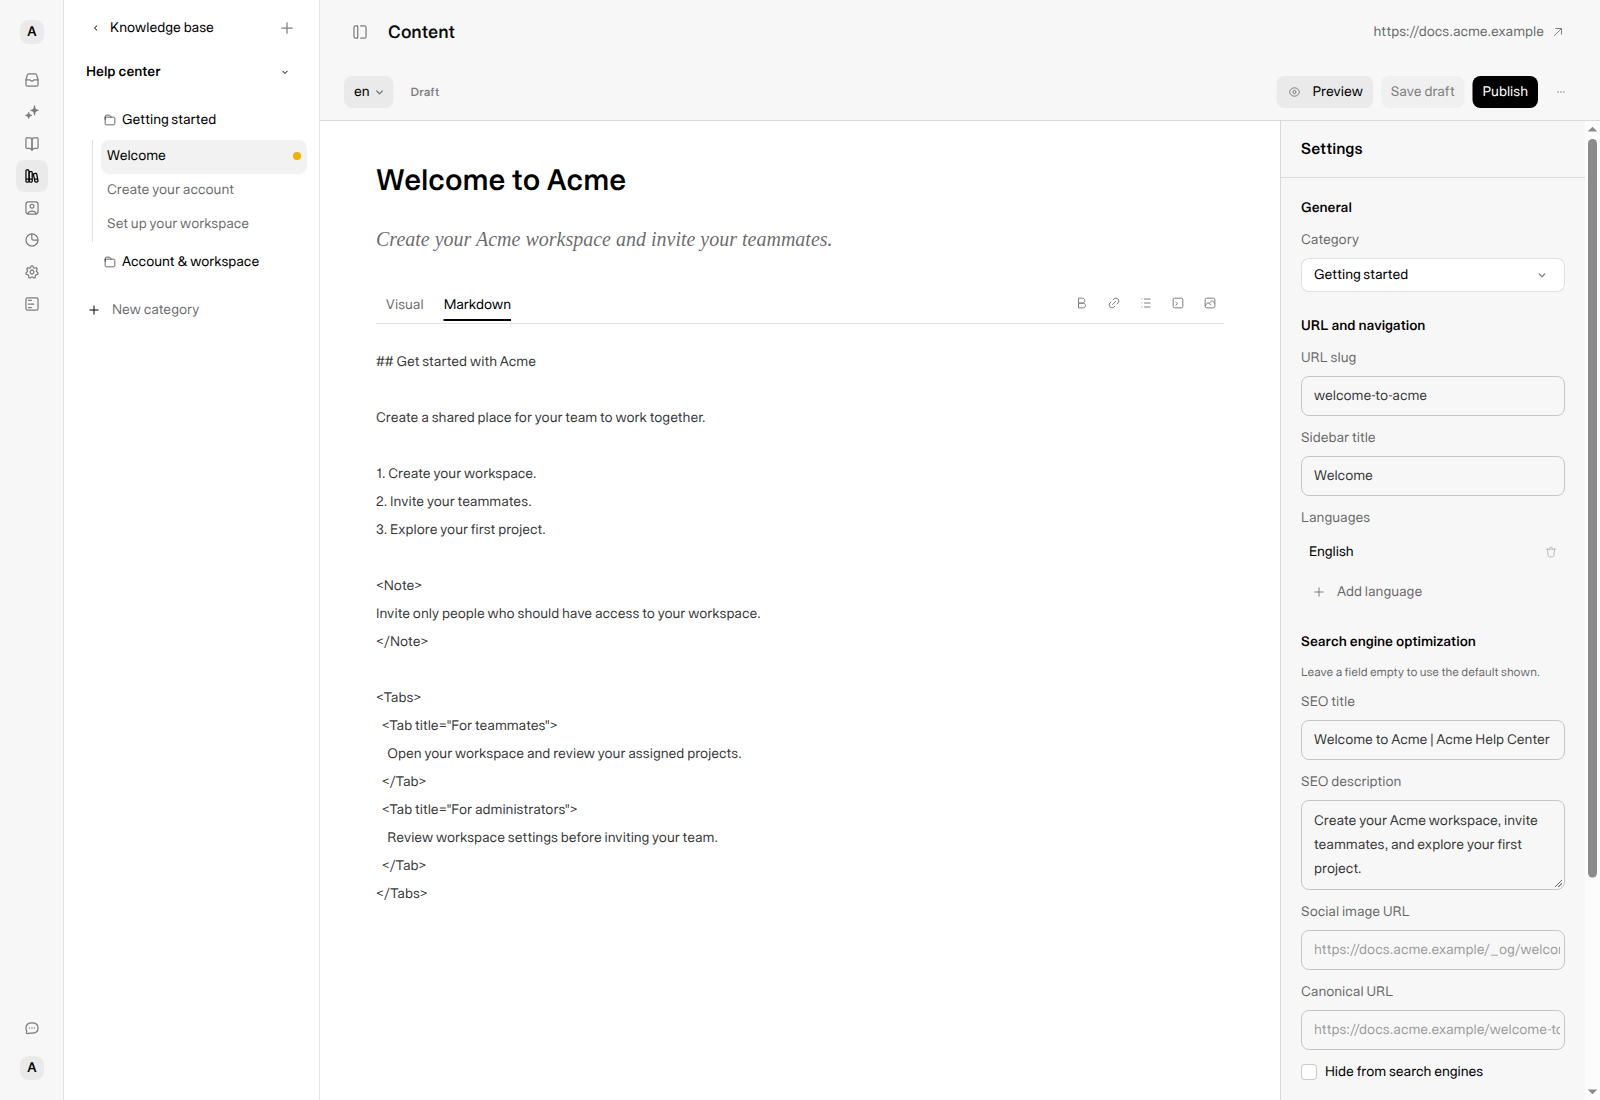
The markup is intentionally visible here because this is the source-editing tab.
Add images and useful links
For a brand-new article, select Save draft before uploading an image. Weav needs a saved article to attach the upload to.
You can:
- Use Insert image in the editor toolbar.
- Paste or drag an image file into the Visual editor.
- Use the Markdown image-upload control while editing source.
Supported uploads are JPEG, PNG, GIF, and WebP, up to 5 MB each. SVG is not an accepted article-image upload. Wait for the upload to finish, then save the article so the inserted reference is stored.
Give images descriptive alternative text. In Markdown, edit the text between the square brackets in the image reference—for example, . Use the uploaded image URL, not a file path from your computer.
For links, select text and use Link, or write a Markdown link. Prefer meaningful labels such as “Connect your custom domain” rather than “Click here.” Check that linked articles are published and that screenshots contain no private customer information or credentials.
Review article settings
On a wide screen, Settings is the panel on the right. On smaller screens, use the Settings button in the editor header.
| Setting | What it controls |
|---|---|
| Category | Where the article belongs in the content structure. |
| URL slug | The article's URL segment. Review it before sharing links. |
| Sidebar title | A shorter navigation label without changing the article's main heading. |
| Languages | Available translations and the controls for adding or selecting a language. |
| SEO title | The title used for search and page metadata; an empty field uses the default shown. |
| SEO description | A concise search summary; an empty field uses the default shown. Line breaks are flattened. |
| Social image URL | A custom sharing image, or the default shown when left empty. |
| Canonical URL | An optional alternative canonical address. Leave it empty for Weav's automatic canonical URL unless you have a specific SEO reason to override it. |
| Hide from search engines | A search-indexing preference, not a privacy control. |
Settings changes need to be saved too. An empty SEO field showing placeholder text is not the same as a custom value you have typed.
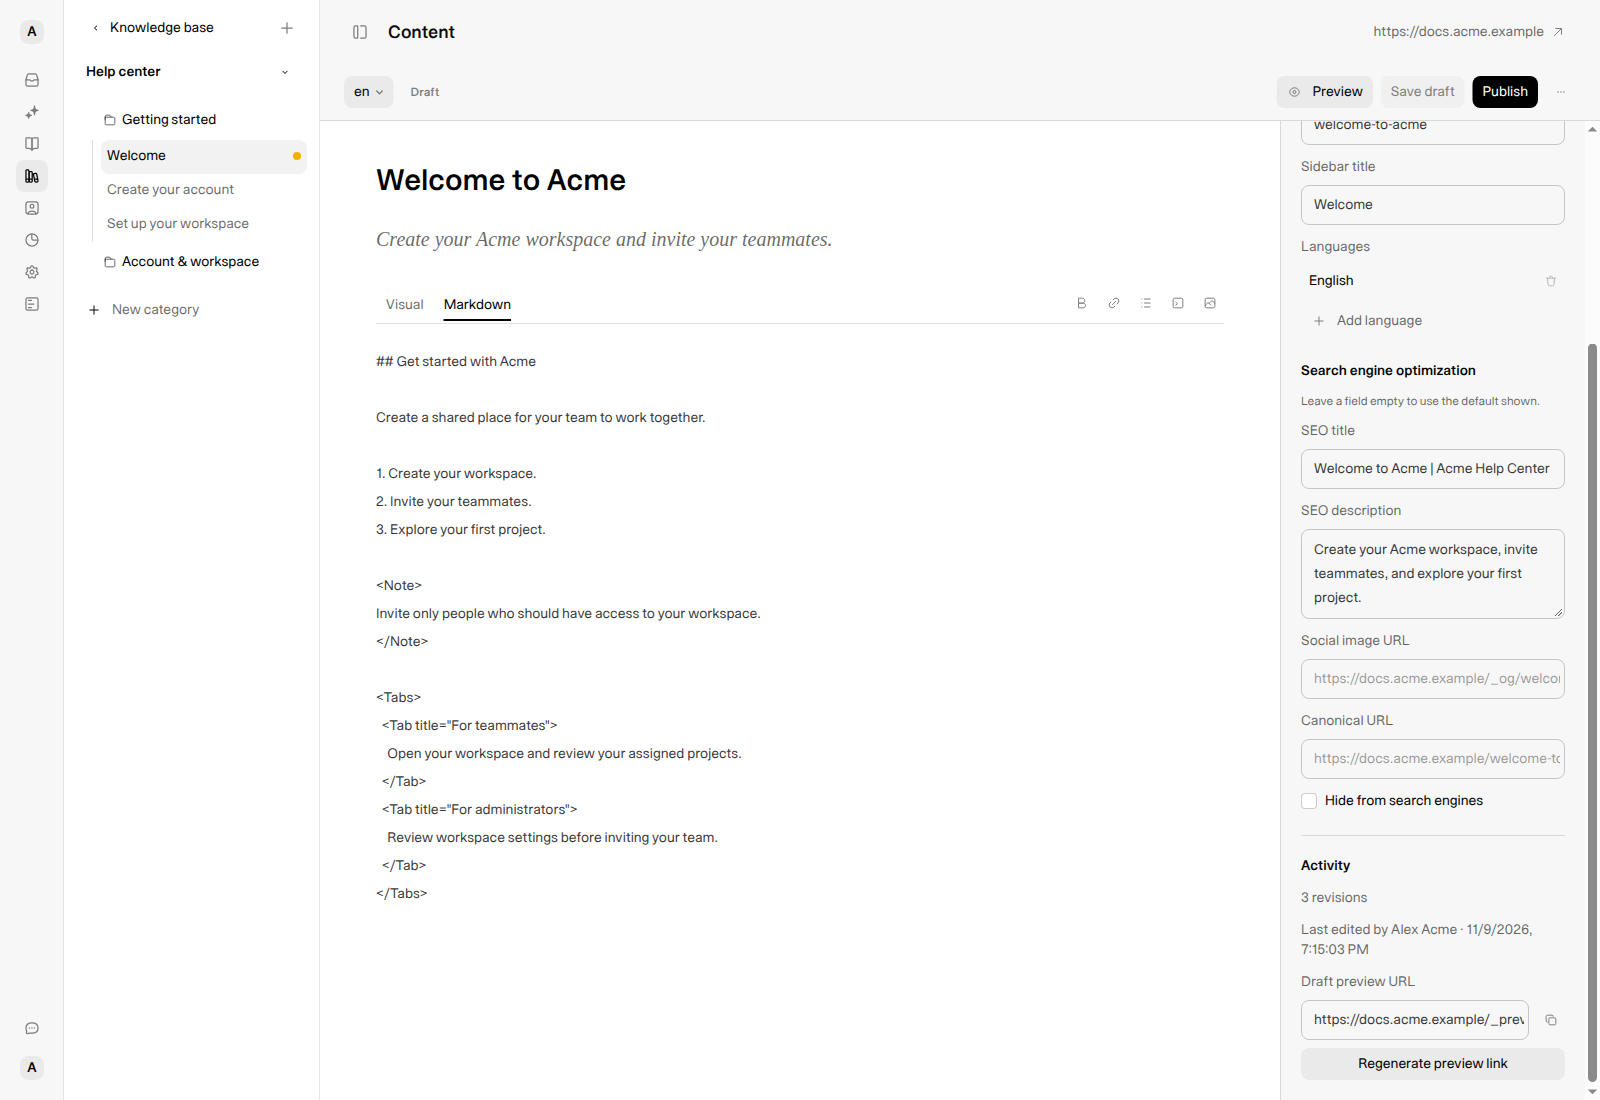
See Manage SEO and discoverability for your Knowledge Base for canonical URLs and indexing. For translation review and publishing, see Add and manage languages in your Knowledge Base.
Save drafts and publish changes deliberately
The action depends on whether the article is already published:
| Article state | Action | Result |
|---|---|---|
| New or existing draft | Save draft | Stores the article and settings without publishing it. |
| Draft ready for readers | Publish | Saves the submitted content and publishes the article. |
| Already published article | Publish changes | Saves your changes to the already-published article. It does not create a separate unpublished review draft. |
Treat Publish changes as a publication action. On an already-published article, the updates become reader-facing when the Knowledge Base is live. Review the content and coordinate approval before applying them. The editor does not silently create a second draft copy for you.
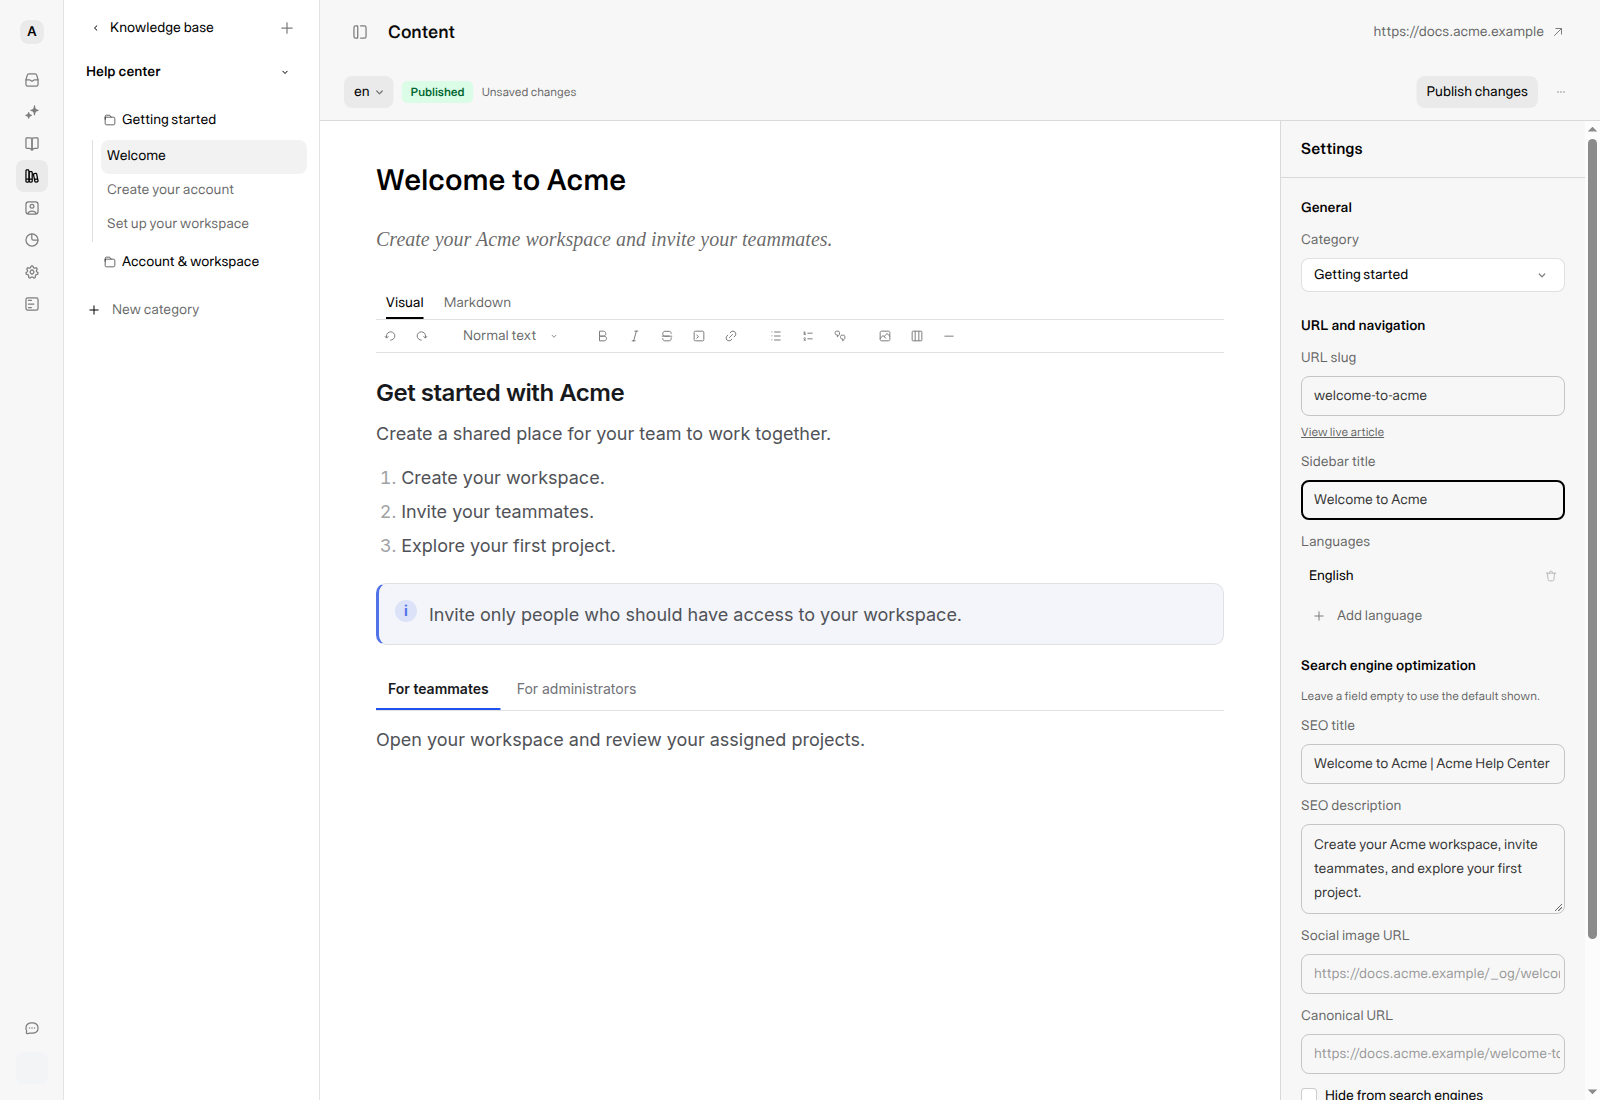
If the Knowledge Base is still private, a published article can show Published · Private. Publishing that article does not take the entire site live. See Go live with your Knowledge Base.
Preview a saved draft before publishing
- Select Save draft after your latest edits.
- Select Preview in the editor header. The saved draft opens in a new tab.
- Check headings, links, images, native blocks, and the layout on desktop and mobile.
- Return to the editor, make any corrections, and save again before refreshing the preview.
Preview shows saved content, not unsaved typing. A new article must be saved before its draft Preview control is available. If the preview looks out of date, save the article and reload the preview before assuming the formatting is broken.
Saved drafts also show a Draft preview URL in the Settings activity area, with a copy control and Regenerate preview link. Regeneration replaces the previous preview link. Share these review links only with trusted reviewers; they are separate from the ordinary public article URL.
Troubleshoot editing and saving
Why can I not edit a generated article?
Articles generated from the API reference are read-only in this editor. The notice tells you to change the OpenAPI annotations instead. This is different from an ordinary article that happens to show a GitHub synced activity label.
For repository-maintained documentation, coordinate editor changes with the GitHub sync workflow: a later repository sync can replace content. See Connect GitHub to your Knowledge Base.
Why is Save draft or Publish changes unavailable?
Check whether there are unsaved changes, a save is already running, or the article is read-only. Complete any required new-category name or active translation review before trying to save. Field errors explain missing or invalid values.
Why does a block look different from an ordinary paragraph?
Some documentation blocks are previewed or protected in Visual and edited through Edit in Markdown. Check the supported syntax and review the saved draft. Do not remove a block solely because its editing controls are different.
What if somebody else changed the article?
If Weav reports that the article changed elsewhere, preserve your unsaved edits before reloading. Review the latest version and reapply the changes that are still needed rather than overwriting another teammate's work.
Where should I review a generated suggestion?
Use the Suggestions workflow to review its proposed content and context before publication. See Review, edit, and publish Knowledge Base suggestions.