Connect chat to your website
To enable chat, open your agent and go to Settings → Chat → Deploy. In the Installation row, Weav gives you a ready-to-use embed script.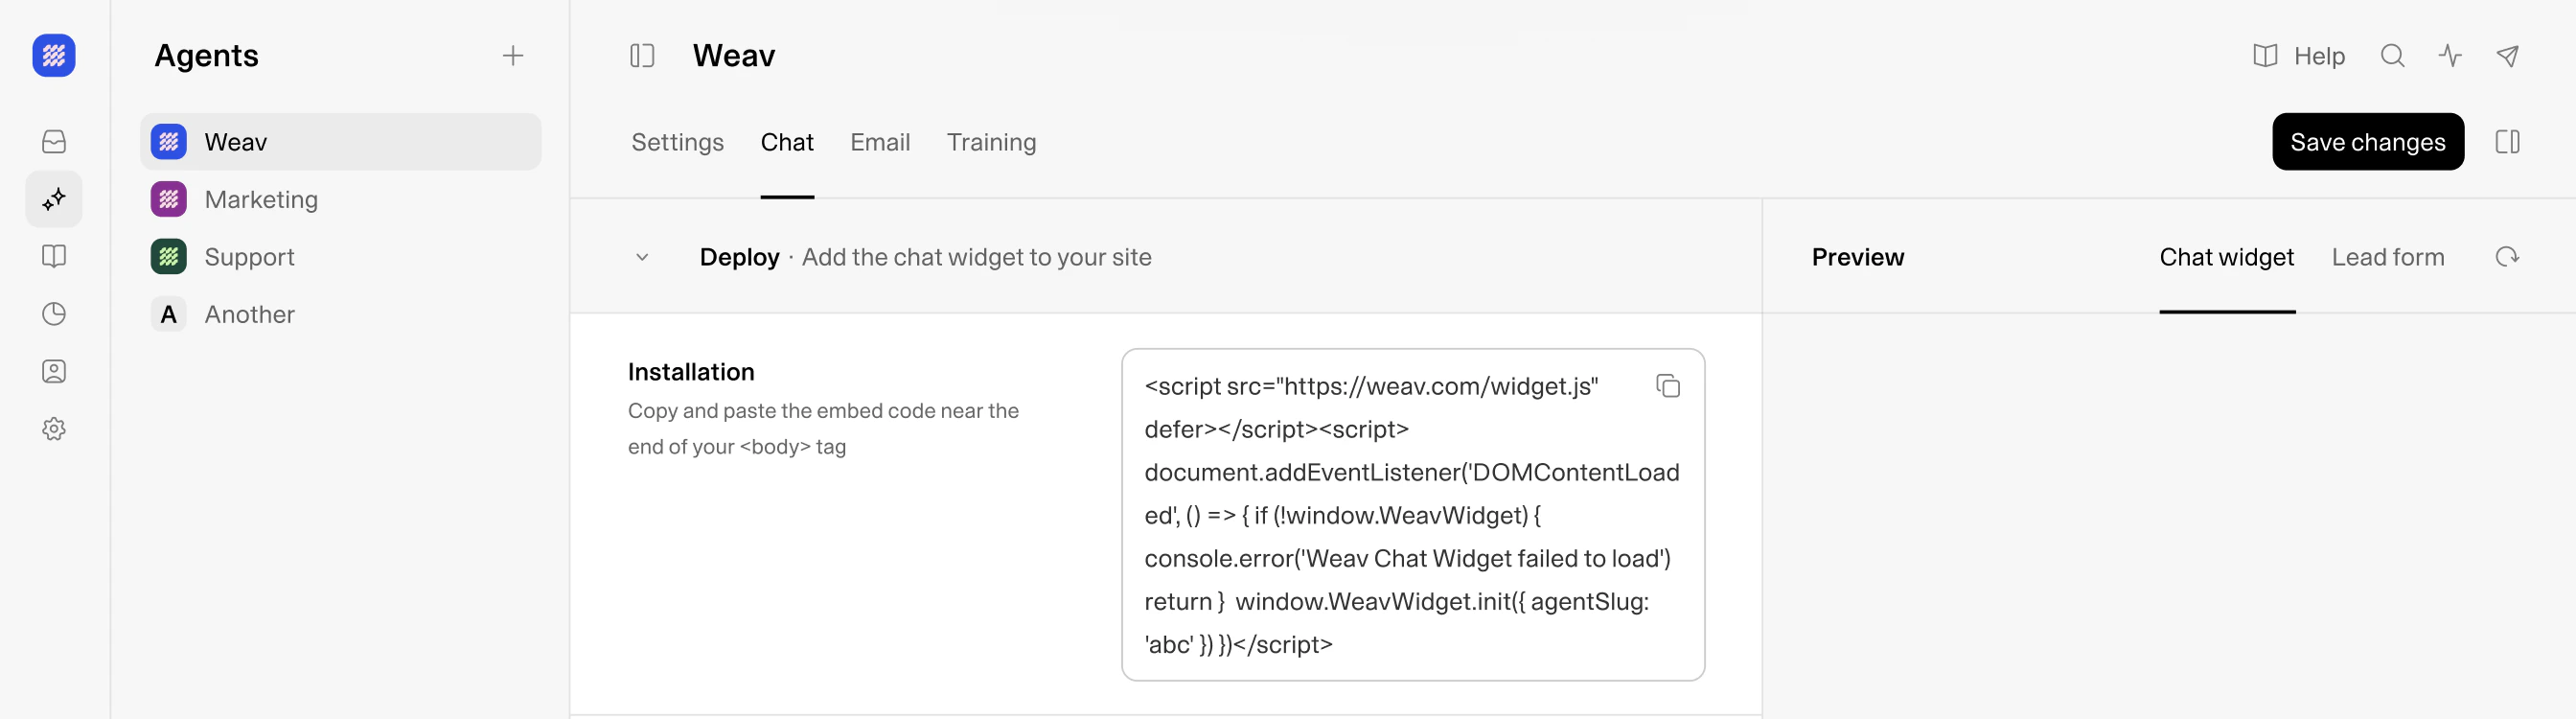
1
Copy the install script
In Deploy → Installation, copy the full embed snippet using the copy button.
2
Paste it into your website
Add the snippet near the end of your site’s
<body> tag.3
Publish your website changes
Deploy your site so the widget script is live for visitors.
4
Verify widget behavior
Open your site, start a test chat, and confirm responses come from the expected agent.
Configure which agent handles email
To enable email handling, open your agent and go to Settings → Email → Deploy, then use Assignment.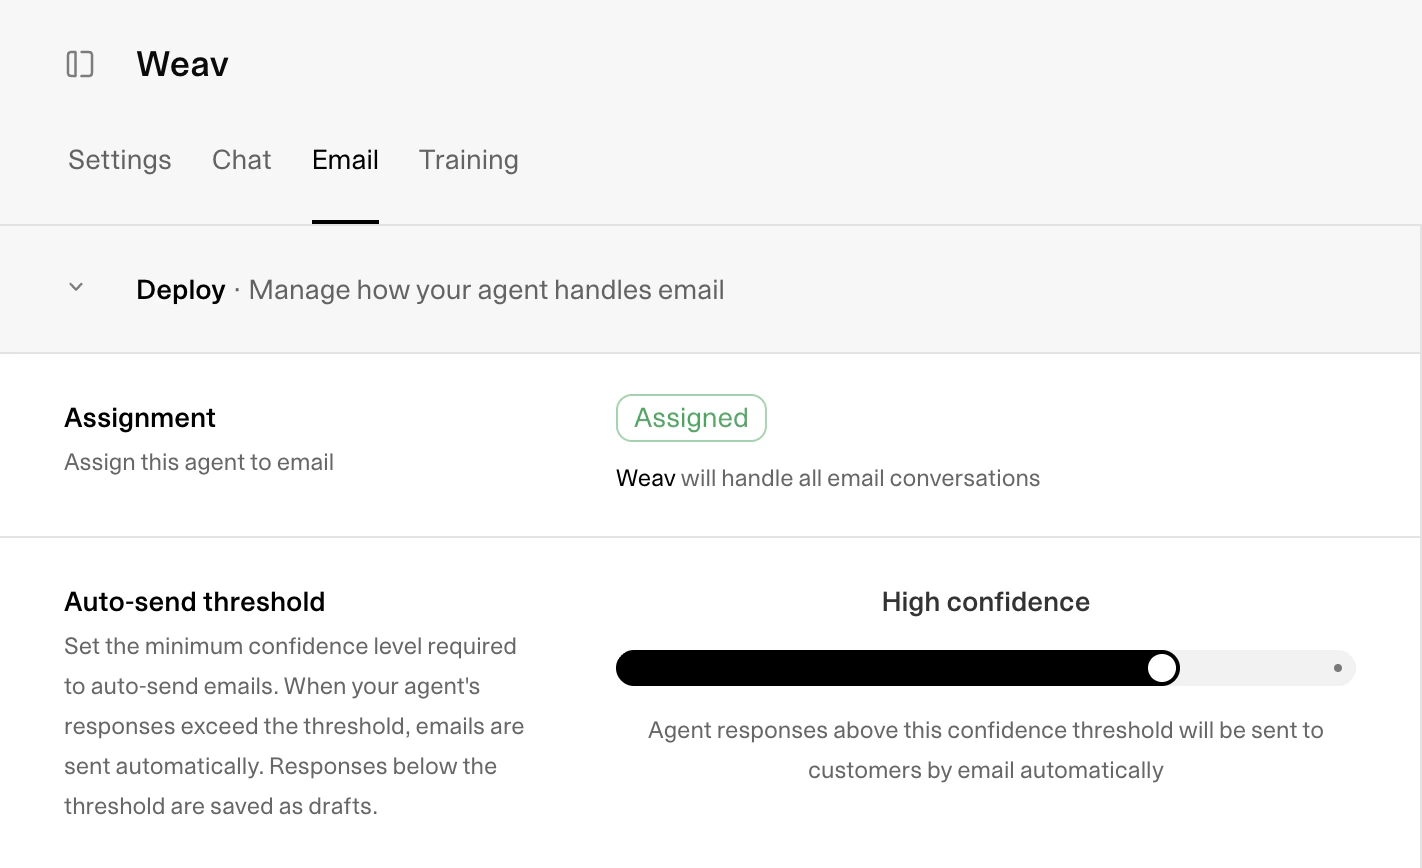
Only one agent can be assigned to email at a time. Assigning a new agent automatically replaces the previously assigned email agent.
What assignment changes in practice
For new inbound email conversations, Weav links the conversation to the active email agent so email drafting and response automation can run. If the conversation is unassigned, Weav can also assign it to that agent automatically (based on eligibility checks). This is what powers the “agent handles email” workflow. If a conversation already has an agent attached, assignment is not forcibly overwritten on that existing thread. Reassignment mainly affects new or eligible conversations moving forward.Pair assignment with your email behavior settings
Right below Assignment, configure the behavior that determines how aggressively the agent responds:- Auto-send threshold controls whether the agent auto-sends high-confidence replies or creates drafts for human review.
- Escalation assignee sets who receives conversations when escalation is needed.
- Escalation rules let you define conditions for escalating to a teammate.
Recommended go-live checklist
Before going live, validate both channels end-to-end:- Chat widget appears on your website and sends/receives messages correctly.
- A new inbound email conversation is linked to the assigned email agent.
- Draft/auto-send behavior matches your selected threshold.
- Escalation routes to the correct teammate.