Overview
Your agent’s Chat settings control how your website chat widget looks, how it behaves, and how safely it handles conversations. If you only change one thing in this area, start here: make sure your chat feels on-brand and has sensible safety limits.These settings are about the chat experience on your website.
They are different from the agent’s core behavior settings (like tone and prohibited phrases).
They are different from the agent’s core behavior settings (like tone and prohibited phrases).
Why this matters
Good chat settings help you:- Build trust with a polished, branded chat experience
- Capture leads with the right form at the right time
- Reduce missed handoffs with escalation assignment/rules
- Prevent abuse with session and rate limits
- Increase conversions by guiding users with quick prompts
Quick-start
If you want a strong setup fast:- Use your brand color and a clear welcome message
- Show lead form as Optional (or Required for sales-heavy use cases)
- Set
Message limitto around100. The maximum number of messages allowed per chat customer session - Set
Rate limitto around10per minute. The maximum number of messages a customer can send per minute - Add 2-3 quick prompts for common questions
- Set an escalation assignee so customer questions get routed to the right user
Section 1: Deploy
This section helps you get chat live and route escalations correctly.Installation
You’ll see an embed code snippet to copy and paste into your website (near the end of the<body> tag).
Escalation assignee
Pick a teammate who should be assigned to conversations when a conversation needs to be escalated from the agent to a human user.Escalation rules
Create rules for when chats should be escalated based on customer input (for example, “cancel account”, “legal”, “speak to manager”).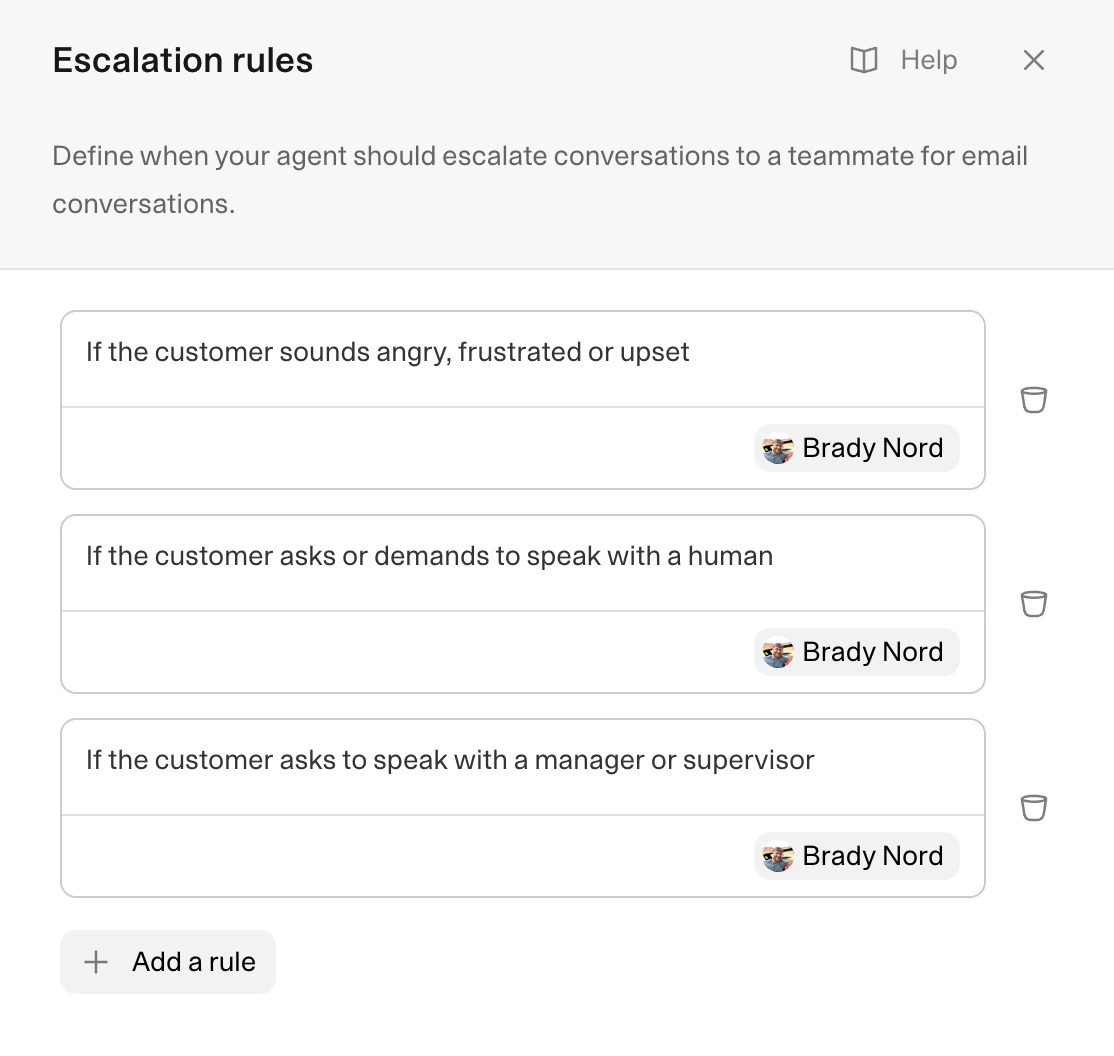
Section 2: Appearance
This section controls how your widget looks and feels to customers.Title
The visible name at the top of the widget.- Example:
Support Team,Weav Assistant
Icon
The avatar/logo shown in the chat widget. Best practice: use a clear, high-contrast icon that matches your brand.Theme (Light or Dark)
Sets the visual style of the chat interface. Best practice: match your site’s theme so chat feels native.Primary color
Used across key widget elements (bubbles, titles, accents). Best practice: use your primary brand color, but keep contrast readable.Chat bubble icon
Changes the launcher icon style. Best practice: pick the icon style that feels most familiar to your audience.Alignment (Left or Right)
Controls where the widget sits on the page. Best practice: place chat where it won’t cover critical CTAs or sticky elements.Welcome message
The first message visitors see. Good example:Hey! How can I help you?
Message placeholder
Hint text in the input box. Good example:Ask about plans, integrations, or setup
Bad example: Type...
Why: specific placeholder text nudges better questions.
Footer text
Optional text at the bottom of the widget (often links to privacy/terms). Good use cases:- Privacy policy link
- Terms link
- Compliance note
Quick prompts
Clickable prompts shown above the input to help users start quickly.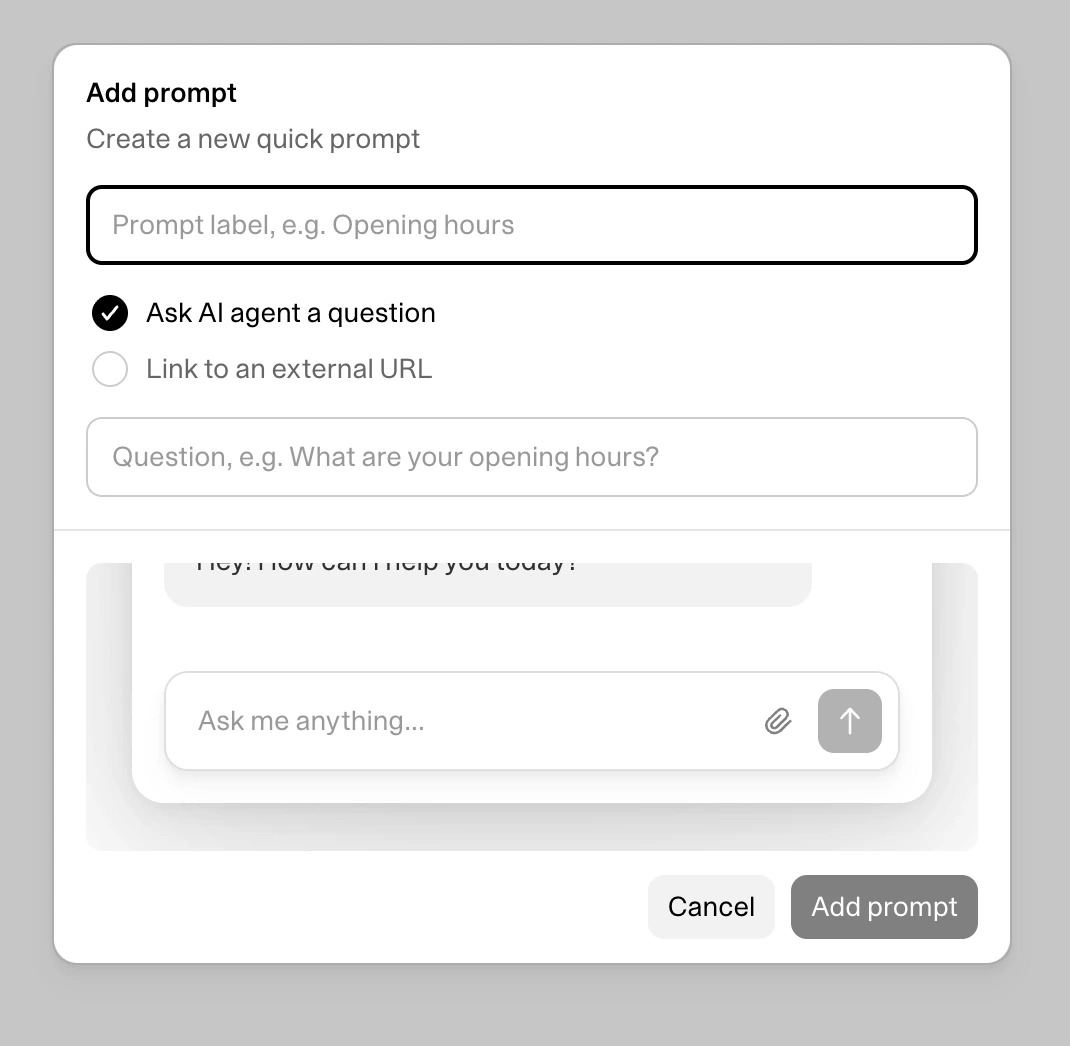
- Question prompts (ask the agent directly)
- External link prompts (sends the customer to a URL)
What plans do you offer?How long does setup take?Book a demo
Section 3: Leads
This section controls your lead capture form.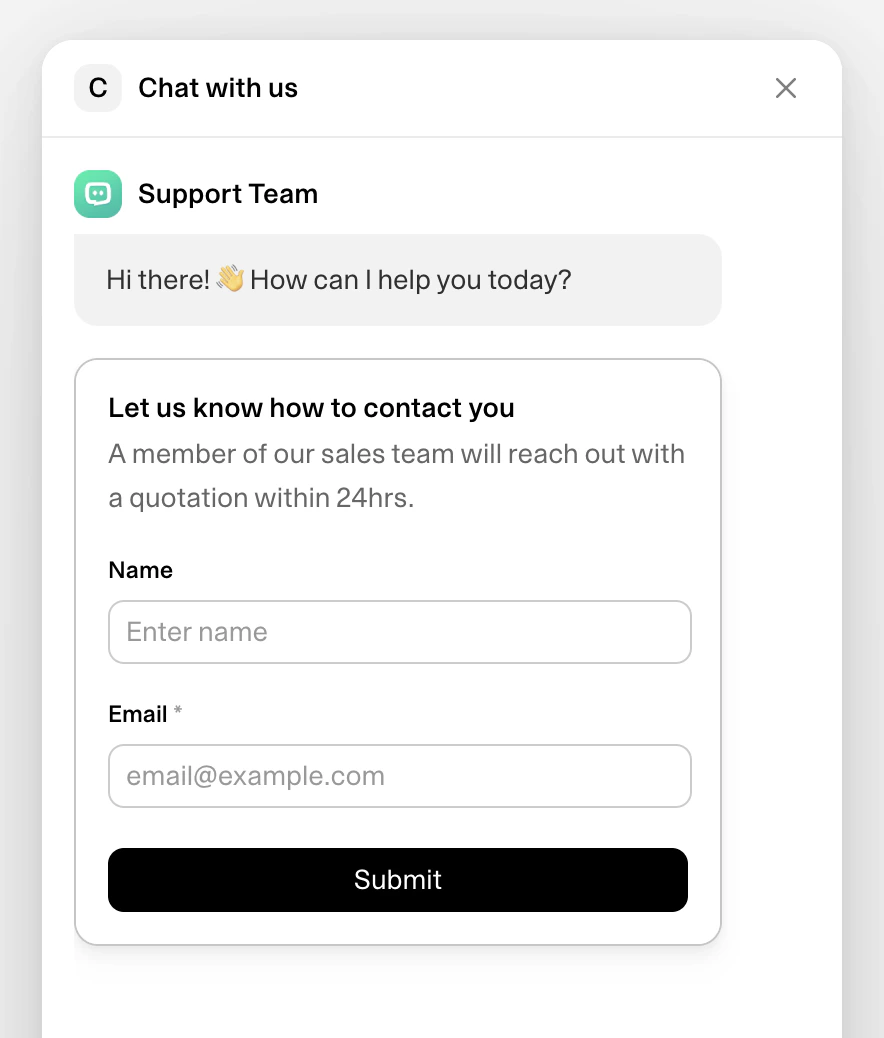
Visibility
Choose if the form is:- Do not show
- Show (optional)
- Show (required)
- Use Optional for support-first chat experiences
- Use Required when lead capture is the primary goal
- Use Hidden if you only want free-form chat without customer information
Form title and introduction
Sets the context before users fill the form. Good example title:Let us know how to contact youGood example intro:
Our team will follow up within 1 business day.
Form fields
Choose and arrange what to collect (name, phone, email, etc.).- You can add, edit, delete, and reorder fields
- Email is typically kept as a required core field
- Ask for only what you’ll actually use
- Keep forms short (2–4 fields is usually enough)
- Make fields required only when truly necessary
Section 4: Security
This section protects your chat from spam and misuse.Message limit
Maximum number of messages in a customers chat session. The customer can always start another chat session in the chat interface. Value: prevents endless sessions that consume resources.Rate limit
Maximum number of messages a customer can send per minute. Value: slows spam/flooding and protects quality of service.How all chat settings work together
A typical visitor journey:- They see your branded launcher and open the widget
- Your welcome message and quick prompts guide their first action
- Lead form appears based on your visibility setting
- They chat within your message/rate limits
- If needed, escalation sends the conversation to the right teammate
Best-practice checklist
- Brand-matched title, icon, and primary color
- Welcome message that states what the assistant can help with
- 3–6 high-value quick prompts
- Lead form set to Optional or Required based on business goal
- Escalation assignee always set
- Message/rate limits set and reviewed monthly
- Footer includes privacy/terms if needed