> ## Documentation Index
> Fetch the complete documentation index at: https://docs.weav.com/llms.txt
> Use this file to discover all available pages before exploring further.
# Framer
> Learn how to install Weav on your Framer site, customize the chat launcher, and open chat from canvas layers.
The Weav Framer plugin lets you add your Weav AI agent to a Framer site without manually copying scripts.
Use it to:
* Install the Weav chat widget
* Choose which Weav agent appears on your site
* Match the launcher to your brand
* Turn buttons, links, and other canvas layers into chat triggers
* Send an optional message when a visitor opens chat
When your AI agent needs help from a person, the conversation can move into your Weav inbox with its history attached.
***
## Before you start
You will need:
* A Weav account
* A Weav workspace with at least one active agent
* A Framer project with Custom Code enabled
* Permission to manage Custom Code and Code Overrides in the project
* A paid Framer Site plan that supports Custom Code
If you do not have a Weav account, you can create one from the plugin or at [weav.com](https://weav.com).
Framer workspace or account upgrades are separate from your site's plan. The individual site must have a plan that supports Custom Code.
***
## Install the Weav plugin
1. Go to the [Framer chatbot plugin](https://www.framer.com/community/marketplace/plugins/weav/).
2. Click **Open Plugin**.
3. Open the plugin in the Framer project where you want to install Weav.
The plugin opens on the Framer canvas.
***
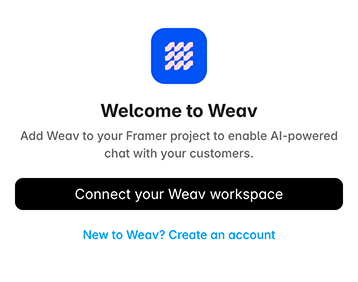 ## Connect your Weav workspace
1. Open the Weav plugin in Framer.
2. Click **Connect your Weav workspace**.
3. Complete the authorization process in the browser tab that opens.
4. When you see **You're Authenticated**, close the tab and return to Framer.
The plugin will detect the completed connection automatically.
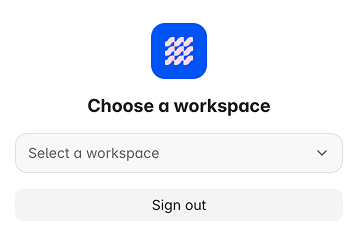
If you belong to more than one Weav workspace, select the workspace you want to connect and click **Next**.
The connection process must be completed within two minutes. If it times out, return to Framer and start the connection again.
***
## Connect your Weav workspace
1. Open the Weav plugin in Framer.
2. Click **Connect your Weav workspace**.
3. Complete the authorization process in the browser tab that opens.
4. When you see **You're Authenticated**, close the tab and return to Framer.
The plugin will detect the completed connection automatically.
If you belong to more than one Weav workspace, select the workspace you want to connect and click **Next**.
The connection process must be completed within two minutes. If it times out, return to Framer and start the connection again.
***
 ## Choose an agent
Select the Weav agent you want to add to your Framer site, then click **Next**.
If your workspace has only one active agent, the plugin selects it automatically.
If no agents are available:
1. Click **Create an agent in Weav**.
2. Create and activate your agent.
3. Return to Framer.
4. Click **Refresh**.
Only active customer-facing agents are shown in the plugin.
***
## Choose an agent
Select the Weav agent you want to add to your Framer site, then click **Next**.
If your workspace has only one active agent, the plugin selects it automatically.
If no agents are available:
1. Click **Create an agent in Weav**.
2. Create and activate your agent.
3. Return to Framer.
4. Click **Refresh**.
Only active customer-facing agents are shown in the plugin.
***
 ## Install the chat widget
After choosing an agent:
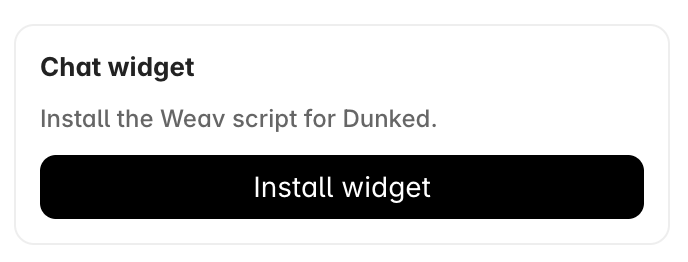
1. Find the **Chat widget** section.
2. Click **Install widget**.
3. Confirm by clicking **Install widget** again.
4. Publish your Framer site.
The plugin adds the Weav widget to your project's Custom Code. Existing custom code is preserved.
Installing the widget updates the Framer project, but it does not update the live website until you publish the site.
After publishing, the Weav launcher will appear on your live site.
***
## Install the chat widget
After choosing an agent:
1. Find the **Chat widget** section.
2. Click **Install widget**.
3. Confirm by clicking **Install widget** again.
4. Publish your Framer site.
The plugin adds the Weav widget to your project's Custom Code. Existing custom code is preserved.
Installing the widget updates the Framer project, but it does not update the live website until you publish the site.
After publishing, the Weav launcher will appear on your live site.
***
 ## Customize the launcher
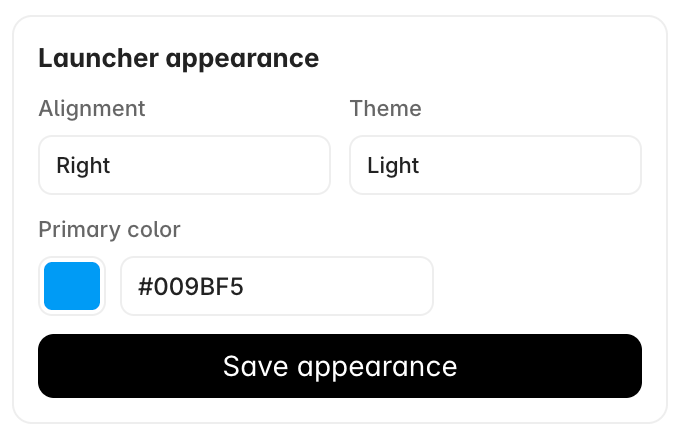
Use the **Launcher appearance** section to match the chat launcher to your site.
You can change:
* **Alignment** — Display the launcher on the left or right
* **Theme** — Use the light or dark theme
* **Primary color** — Choose a color or enter its hex value
Click **Save appearance** when you are finished.
The settings are saved to the selected agent in Weav and will apply anywhere that agent's launcher is used.
Choose a primary color with enough contrast against your site background so the launcher remains easy to find.
***
## Customize the launcher
Use the **Launcher appearance** section to match the chat launcher to your site.
You can change:
* **Alignment** — Display the launcher on the left or right
* **Theme** — Use the light or dark theme
* **Primary color** — Choose a color or enter its hex value
Click **Save appearance** when you are finished.
The settings are saved to the selected agent in Weav and will apply anywhere that agent's launcher is used.
Choose a primary color with enough contrast against your site background so the launcher remains easy to find.
***
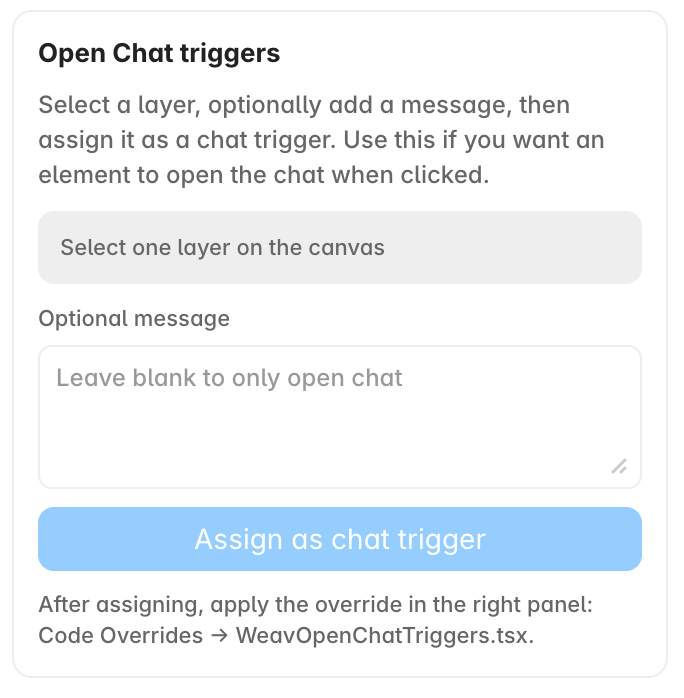 ## Open chat from a canvas layer
Open Chat triggers let visitors open Weav by clicking a button, link, card, or other Framer canvas layer.
You can also attach a message to the trigger. This is useful for actions such as:
* Ask about pricing
* Book a demo
* Get help with an order
* Learn more about a feature
The regular floating launcher remains visible when you use Open Chat triggers.
### Create a trigger
1. Install the Weav widget first.
2. Select exactly one layer on the Framer canvas.
3. Find the **Open Chat triggers** section in the plugin.
4. Enter an **Optional message**, or leave it blank to only open chat.
5. Click **Assign as chat trigger**.
The plugin creates a Code Override for the selected layer.
### Apply the Code Override
Assigning the trigger creates the override, but you must also apply it to the layer:
1. Keep the layer selected.
2. Open **Code Overrides** in Framer's right panel.
3. Select **WeavOpenChatTriggers.tsx**.
4. Select the override created for the layer.
When a visitor clicks the layer, it will open Weav. If you added a message, the message will also be sent to the agent.
Trigger messages can contain up to 500 characters.
### Remove a trigger
Find the trigger in the plugin and click **Remove**.
The plugin keeps a safe, inactive version of the override so existing Framer layers do not break. You can also remove the Code Override from the layer in Framer if it is no longer needed.
***
## Switch agents
If your workspace has multiple agents:
1. Click **Switch agent**.
2. Choose another agent.
3. Click **Reinstall widget**.
4. Publish your site.
Reinstalling updates the widget so the newly selected agent appears on the live site.
Selecting another agent does not update the published widget by itself. Reinstall the widget and publish the site to complete the change.
***
## Remove Weav from your site
1. Open the Weav plugin.
2. Find the **Chat widget** section.
3. Click **Remove**.
4. Confirm by clicking **Remove widget**.
5. Publish your Framer site again.
The widget will remain on the live site until the updated project is published.
***
## Sign out
Click **Sign out** at the bottom of the plugin to disconnect your Weav account from the current Framer session.
Signing out does not remove an already installed widget from the site. Use **Remove widget** and publish the site if you want to remove Weav.
***
## Troubleshooting
### The widget does not appear on my live site
Check that:
* You clicked **Install widget**
* Custom Code is enabled for the site
* Your Framer Site plan supports Custom Code
* You published the site after installing the widget
### Framer says Custom Code is read-only
Open the plugin from the Framer canvas rather than Preview.
Also check that:
* The site has a paid plan that supports Custom Code
* Custom Code is enabled in Site Settings
* Your Framer role has permission to change the project
### The plugin cannot create chat triggers
Check that:
* The widget is installed
* Exactly one canvas layer is selected
* You have permission to create or update Code Override files
### Clicking a trigger does nothing
Creating a trigger in the plugin does not automatically apply it to the layer.
Select the layer and apply its override from:
**Code Overrides → WeavOpenChatTriggers.tsx**
Then publish the site.
### The wrong agent appears on the site
Choose the correct agent, click **Reinstall widget**, and publish the site again.
### The sign-in process timed out
Return to the plugin and click **Connect your Weav workspace** again. Complete the authorization process within two minutes.
### My workspace has no available agents
Create and activate an agent in Weav, then return to the plugin and click **Refresh**.
### I cannot save another chat trigger
Remove unused triggers or shorten their optional messages, then try again.
## Open chat from a canvas layer
Open Chat triggers let visitors open Weav by clicking a button, link, card, or other Framer canvas layer.
You can also attach a message to the trigger. This is useful for actions such as:
* Ask about pricing
* Book a demo
* Get help with an order
* Learn more about a feature
The regular floating launcher remains visible when you use Open Chat triggers.
### Create a trigger
1. Install the Weav widget first.
2. Select exactly one layer on the Framer canvas.
3. Find the **Open Chat triggers** section in the plugin.
4. Enter an **Optional message**, or leave it blank to only open chat.
5. Click **Assign as chat trigger**.
The plugin creates a Code Override for the selected layer.
### Apply the Code Override
Assigning the trigger creates the override, but you must also apply it to the layer:
1. Keep the layer selected.
2. Open **Code Overrides** in Framer's right panel.
3. Select **WeavOpenChatTriggers.tsx**.
4. Select the override created for the layer.
When a visitor clicks the layer, it will open Weav. If you added a message, the message will also be sent to the agent.
Trigger messages can contain up to 500 characters.
### Remove a trigger
Find the trigger in the plugin and click **Remove**.
The plugin keeps a safe, inactive version of the override so existing Framer layers do not break. You can also remove the Code Override from the layer in Framer if it is no longer needed.
***
## Switch agents
If your workspace has multiple agents:
1. Click **Switch agent**.
2. Choose another agent.
3. Click **Reinstall widget**.
4. Publish your site.
Reinstalling updates the widget so the newly selected agent appears on the live site.
Selecting another agent does not update the published widget by itself. Reinstall the widget and publish the site to complete the change.
***
## Remove Weav from your site
1. Open the Weav plugin.
2. Find the **Chat widget** section.
3. Click **Remove**.
4. Confirm by clicking **Remove widget**.
5. Publish your Framer site again.
The widget will remain on the live site until the updated project is published.
***
## Sign out
Click **Sign out** at the bottom of the plugin to disconnect your Weav account from the current Framer session.
Signing out does not remove an already installed widget from the site. Use **Remove widget** and publish the site if you want to remove Weav.
***
## Troubleshooting
### The widget does not appear on my live site
Check that:
* You clicked **Install widget**
* Custom Code is enabled for the site
* Your Framer Site plan supports Custom Code
* You published the site after installing the widget
### Framer says Custom Code is read-only
Open the plugin from the Framer canvas rather than Preview.
Also check that:
* The site has a paid plan that supports Custom Code
* Custom Code is enabled in Site Settings
* Your Framer role has permission to change the project
### The plugin cannot create chat triggers
Check that:
* The widget is installed
* Exactly one canvas layer is selected
* You have permission to create or update Code Override files
### Clicking a trigger does nothing
Creating a trigger in the plugin does not automatically apply it to the layer.
Select the layer and apply its override from:
**Code Overrides → WeavOpenChatTriggers.tsx**
Then publish the site.
### The wrong agent appears on the site
Choose the correct agent, click **Reinstall widget**, and publish the site again.
### The sign-in process timed out
Return to the plugin and click **Connect your Weav workspace** again. Complete the authorization process within two minutes.
### My workspace has no available agents
Create and activate an agent in Weav, then return to the plugin and click **Refresh**.
### I cannot save another chat trigger
Remove unused triggers or shorten their optional messages, then try again.